
The Complete FUE Surgical Tray: Instruments, Quantities and Setup
What actually belongs on an FUE surgical tray, phase by phase — anesthesia, extraction, graft storage, incision and placement — with the quantity logic behind each item, sterile setup practice and the restock triggers that keep sessions from stalling.
A complete FUE tray is organized by the five phases of the procedure — anesthesia, extraction, graft storage, incision and placement — with each phase contributing a short, specific instrument list and a quantity rule tied to graft count and team size. The core of a typical 2,000–3,000-graft session: syringes and needles for ring blocks and tumescence; punches (in at least two diameters) with the micromotor handpiece or manual handles; chilled dishes, holding solution and gauze for storage; sapphire blades or needles across several widths in their holders; and placing forceps at a multiple of simultaneous placers. Setting the tray up by phase, in the order the case runs, is not ceremony — it is how a circulating technician can see at a glance what is about to run out.
Key takeaways
- Organize the tray by the five procedure phases in running order — anesthesia, extraction, storage, incision, placement — so shortages are visible before they stall the case.
- Quantity logic is per-graft for consumables (punches, blades, gauze), per-operator for instruments (forceps, handles), and per-case for anesthesia and solutions.
- Every sharp and every graft-contact item needs a stocked spare on the sterile field; the restock trigger is opening the spare, not finishing it.
- Count and lay out the tray from a written checklist before scrub — memory-based setup is where 200-graft delays are born.
- Restock triggers belong to inventory, not to the session: reorder when stock hits two sessions of cover, not when the shelf looks empty.
Why tray discipline is a purchasing topic
The tray is where a clinic's buying decisions meet a running case. Every shortage mid-session — a punch diameter not stocked, a blade width missing, the last pair of straight placing forceps bent — converts directly into open-wound waiting time or a compromise instrument choice. Clinics tend to treat tray composition as the surgical team's private knowledge, which works until the one technician who carries the list in their head is away. Writing the tray down, phase by phase with quantities and the logic behind them, turns setup into a checkable process and turns purchasing into arithmetic: sessions per month × items per session × a safety factor. The same discipline underpins the full clinic startup checklist, of which the tray is the daily-repeated core.
What follows walks the tray in procedure order. Quantities are stated as logic rather than fixed numbers, because a 1,200-graft hairline case and a 3,500-graft megasession consume very differently — but the logic scales.
Phase 1: Anesthesia
The opening phase needs syringes (typically several small-volume for nerve blocks and ring blocks, larger volumes for tumescent infiltration), fine needles in two or three sizes, the local anesthetic agents and dilution supplies per the clinic's protocol, skin markers and a surgical ruler or density template for donor and recipient marking, antiseptic solution, and drapes.
Quantity logic here is per-case with a protocol multiplier: anesthesia consumption tracks the size of the marked donor and recipient areas more than graft count, and re-dosing across a long session must be planned into the count, not improvised. The practical failure mode is not running out of anesthetic — clinics rarely do — but running out of the fine needles the team prefers for patient comfort and falling back to coarser stock. Whatever the protocol specifies, stock it at depth.
Phase 2: Extraction
The extraction section carries the punches — the case's primary sharps — plus their drive system and the retrieval instruments. Concretely: punches in the planned diameter and one step finer and coarser (donors are not uniform, and switching diameter mid-session is routine), the micromotor handpiece with a spare, or manual handles for manual technique; fine-point extraction forceps at one to two pairs per extracting operator plus spares; gauze in quantity; and saline spray to keep the donor field moist.
Punch quantity logic is per-graft divided by the punch's realistic edge life under your protocol — a number the team should know from experience rather than from the brochure, and one that differs sharply between single-use and reusable programs. The selection logic behind diameters and edge geometry is its own topic; the tray-level rule is simpler: never set up with exactly the number of punches the plan requires. The spare handpiece deserves its own sentence — a micromotor failure with no backup does not delay a session, it ends it.
Phase 3: Graft storage
Between extraction and placement, grafts live in the storage station: chilled dishes or trays (with a cooling method that holds temperature for hours — cold packs, a cooling plate, or a dish-over-ice arrangement the team actually monitors), holding solution per protocol (chilled saline at minimum, buffered solutions where the clinic has adopted them), broad-platform handling forceps for sorting, a counting grid or tally system, and labels for dish-level tracking of graft type — singles, doubles, multis — so placement can pull the right caliber without re-sorting.
The quantity logic is per-graft-count with segregation overhead: enough dish capacity that graft types stay separated even at the session's peak, plus solution volume to refresh dishes as they warm. Time outside the body, temperature and hydration are the storage variables that matter most; labeling is what prevents the quiet error of multi-hair grafts reaching the hairline. Storage consumables are cheap against everything else on this tray — under-stocking them saves nothing and risks the most valuable material in the room.
Phase 4: Incision
The incision section carries sapphire blades across the planned widths — hairline sizes through the density widths, each in labeled quantity — their dedicated holders (blades and holders are brand-paired; verify fit at setup, not mid-case), or needles where the plan uses needle sites; a fresh depth-setting reference from that day's measured graft lengths; and marking support for zone boundaries.
Blade quantity logic is per-zone consumption weighted toward the middle widths, plus chip spares: sapphire fails by chipping, so each width on the tray needs at least one backup regardless of how few incisions that width will make. Which widths a case plan actually consumes — and why a flat same-quantity-per-width order mismatches reality — is mapped in the sapphire blade size chart. At setup, blades should be laid out in width order with their labels visible; the mid-case question "is this the 1.3 or the 1.4?" has no good answer under magnification and time pressure.
Phase 5: Placement
Placement needs placing forceps — the narrow, often angled patterns — at a firm multiple of simultaneous placers (two pairs per placer on the field is a common working rule, with bench spares beyond that), or loaded implanter pens in rotation where the clinic places by implanter; saline spray for site moistening; gauze; and the dish-to-field logistics that keep grafts moving: small transfer dishes, and a clear convention for which graft type is in play.
Forceps multiply because they are the phase's failure point: tips bend, and a placer without a working instrument is idle while grafts sit in solution. The taxonomy of which forceps patterns serve placement versus extraction and bench work — and why those should not be the same instruments — is covered in the forceps types guide. For implanter-based teams, pen rotation math replaces forceps math: enough bodies that loading stays ahead of placing, with needle stock per gauge planned the way blade widths are — the implanter needle gauge chart maps which gauges pair with which graft types.
The tray checklist
The table below is a template to adapt, not a prescription — protocols differ, and the point is that your version exists in writing and gets checked at every setup.
| Phase | Core items | Quantity logic |
|---|---|---|
| Anesthesia | Syringes (small + tumescence volumes), fine needles ×2–3 sizes, anesthetic agents, antiseptic, markers, ruler/template, drapes | Per-case by protocol and marked area; re-dosing planned in; preferred fine needles at depth |
| Extraction | Punches in planned diameter ±1 step, handpiece + spare (or manual handles), extraction forceps per operator + spares, gauze, saline spray | Punches: grafts ÷ realistic edge life, never exact count; forceps 1–2 per operator + spares |
| Storage | Chilled dishes/trays + cooling method, holding solution, handling forceps, counting grid, labels | Dish capacity for graft-type segregation at peak; solution volume to refresh as dishes warm |
| Incision | Sapphire blades per width in labeled quantity, holders (fit-verified), depth reference, zone marking | Per-zone consumption weighted to mid widths; ≥1 chip spare per width on the field |
| Placement | Placing forceps ×2 per placer + bench spares, or pen bodies in rotation + needles per gauge, transfer dishes, saline spray, gauze | Forceps/pens per simultaneous placer, not per team; needle stock per gauge like blade widths |
Sterile organization practice
Three habits separate trays that run from trays that improvise. Layout mirrors the case: phases arranged left to right (or in whatever spatial convention the room uses) in running order, so the circulating technician reads the tray like a timeline and sees the next phase's readiness before it starts. Spares live on the field, labeled as spares: the restock trigger is opening a spare, not exhausting it — the moment the backup handpiece or the spare 1.3 mm blade comes into play, its replacement is fetched, and the field is never running on its last unit of anything. Count in, count out: sharps counted at setup and at close, against the written checklist, initialed. The checklist also closes the loop with purchasing: items marked as opened-spare during cases are the earliest, cheapest signal that a par level is set too low.
Packaging plays a quiet role in all of this: unit-packed sterile consumables with legible size and lot labels are what make a phase-organized tray checkable at a glance, which is one more reason packaging quality belongs in supplier evaluation alongside price and specification.
Restock triggers and the purchasing loop
Session-level triggers (a spare opened, a width running low mid-case) feed clinic-level rules. The workable pattern: set a par level per item from sessions-per-month × per-session consumption, hold a floor of two sessions' cover at all times, and reorder the moment stock touches the floor — not when the shelf looks empty, because supplier lead times on sterile consumables are measured in weeks once customs and lot documentation are involved. Items with long lead times or single-supplier dependence (specific punch diameters, brand-paired blades and holders, implanter needles in your gauges) deserve a deeper floor. Consolidating those recurring lines into scheduled bulk orders, rather than reactive one-offs, is where the per-unit economics improve; the mechanics are covered in the bulk consumables guide.
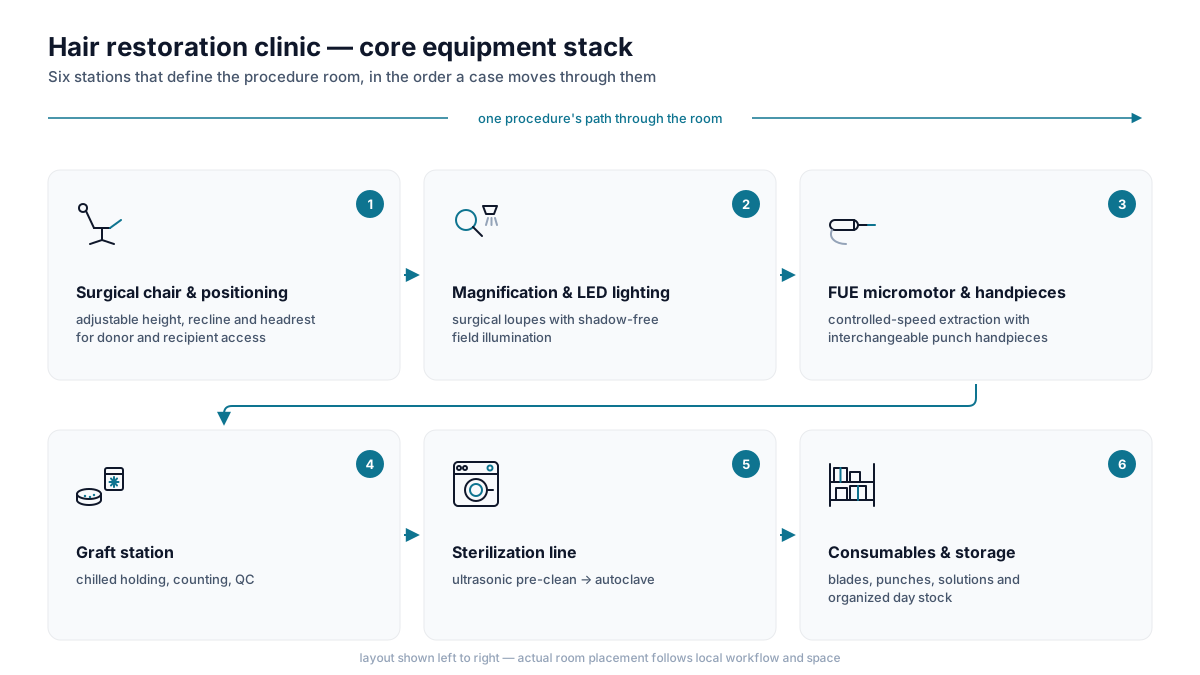
The tray, finally, is the honest audit of the whole equipment stack: if setup from the written checklist is fast, complete and calm, purchasing, storage and sterile processing are all working. If it is not, the checklist will tell you exactly which of them is not.
Frequently asked questions
What instruments does a complete FUE tray include?
Organized by phase: syringes, needles and anesthetic supplies for blocks and tumescence; punches in the planned diameter plus a step either side, with the handpiece and a spare; chilled dishes, holding solution and counting supplies for storage; sapphire blades across the planned widths in their holders; and placing forceps or implanter pens with transfer logistics, plus gauze, saline spray, drapes and marking tools throughout.
How many punches and blades does one session need?
Punches: planned graft count divided by the realistic edge life under your protocol, plus margin — never the exact number. Blades: per-zone consumption weighted toward the middle widths, with at least one chip spare per width on the field. Both numbers should come from your team’s logged experience, not from supplier brochures.
How many placing forceps should be on the field?
A common working rule is two pairs per simultaneous placer on the sterile field, with additional bench spares beyond that. Placing tips bend, and an idle placer means grafts waiting in solution — forceps are cheap insurance against the most expensive kind of delay.
What is the best way to organize the tray?
By phase, in the order the case runs: anesthesia, extraction, storage, incision, placement. Lay out from a written checklist, keep labeled spares on the field, and treat opening any spare as the trigger to fetch its replacement. Count sharps in at setup and out at close against the same checklist.
When should tray consumables be reordered?
On par levels, not on visual inspection: compute per-item consumption from sessions per month, hold a floor of at least two sessions’ cover, and reorder when stock touches the floor. Deepen the floor for long-lead or single-supplier items such as specific punch diameters, brand-paired blades and implanter needles.
Related articles
Hair Transplant Clinic Startup Checklist: Every Equipment Category, in Order
A category-by-category equipment walkthrough for opening a hair transplant clinic: what belongs in the OR, the sterilization line, instrument sets and consumables — and the order to buy it in.
Hair Transplant Forceps: Types, Tip Shapes and How to Choose
How to read the forceps wall of a surgical catalog: what straight and curved patterns, tip profiles, jaw textures and materials each do in graft work, why jeweler-style numbering is not a standard, and how to inspect and retire forceps.
Graft Storage Solutions Compared: Saline, Buffered Media and Additives
How chilled saline, buffered hypothermic solutions and platelet-derived additions compare for holding grafts between extraction and placement — evidence framed cautiously, with protocol and cost.
Hair Transplant Clinic Equipment: The Complete Stack
The full equipment stack of a hair transplant clinic, from operating table to autoclave — written for founders specifying their first operating room.